How to Remove a Ceiling Fan
By circulating air, ceiling fans can cool off your home, improve airflow in kitchens and help ensure a good night’s sleep in bedrooms, as well as provide light and decoration. They can also wear out over time, with many ceiling fans having an estimated life of 10 years. This guide to ceiling fan removal reviews the steps for safely removing both a flush mounted ceiling fan and downrod ceiling fan.
Tip: If your ceiling fan is working improperly, before removing it, review the guides for ceiling fan troubleshooting and Hampton Bay ceiling fan troubleshooting as needed to see if you can fix the problem rather than assume the fan is broken.
Shut off the Power and Prepare for Removal

Determine your type of ceiling fan, as some have different components and are taken apart in different ways. With a downrod mounted ceiling fan, the fan hangs away from the ceiling at the end of a metal pole called a downrod. With a flush mounted ceiling fan, as the name suggests, the housing is designed to be flush with the ceiling.
Before removing a ceiling fan or any fixture that runs on electricity, turn off the power at the circuit breaker.
Be sure to test the light switch or remote control to make sure the power is out. Consider using a voltage tester before disconnecting any wiring.
Use a step ladder for easier access when dismantling a ceiling fan. You may need a helper to take down the heavier parts and keep your balance.
Tip: Have a selection of screwdrivers of different sizes and lengths at hand to ensure that you can reach and turn the screws easily.
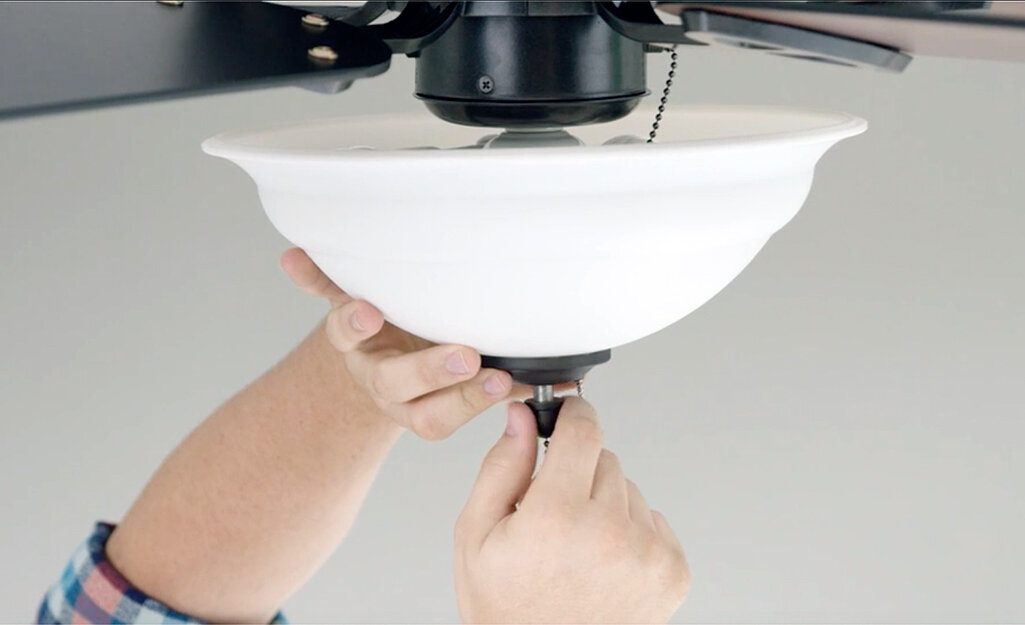
Remove Light Bulbs and Globes

Not all ceiling fans have light kits, or the separate cover and hardware for the electric light. For those that do, remove the globes and light bulbs first.
If the fan was on recently, give the bulbs and adjacent parts time to cool off before touching them.
If the globes cover the light bulbs, remove the globes first by using a screwdriver to loosen the screws that hold them in place. Then lower them free. (Some globes can simply be unscrewed.) Take care not to drop the globe, and be sure to save the screws.
Unscrew the exposed light bulbs. You may want to re-use them in the replacement fan if they match.
Remove Light Kit as Needed
Many flush mounted ceiling fans require removal of the light kit to be able to access the screws that attach the fan to the ceiling.
Identify the screws that secure the light kit to the fan housing.
Remove the screws with a screwdriver. You may need a helper to support the light kit when the screws have been removed.
Disconnect the wires that run from the light kit to the fan.
Remove Fan Blades

You may need to remove the fan blades before you can detach the rest of the fan.
Use a screwdriver to remove the screws that attach the fan blade bracket to the fan housing. You should be able to leave the metal bracket attached to the fan blade.
Repeat for the remaining fan blades.
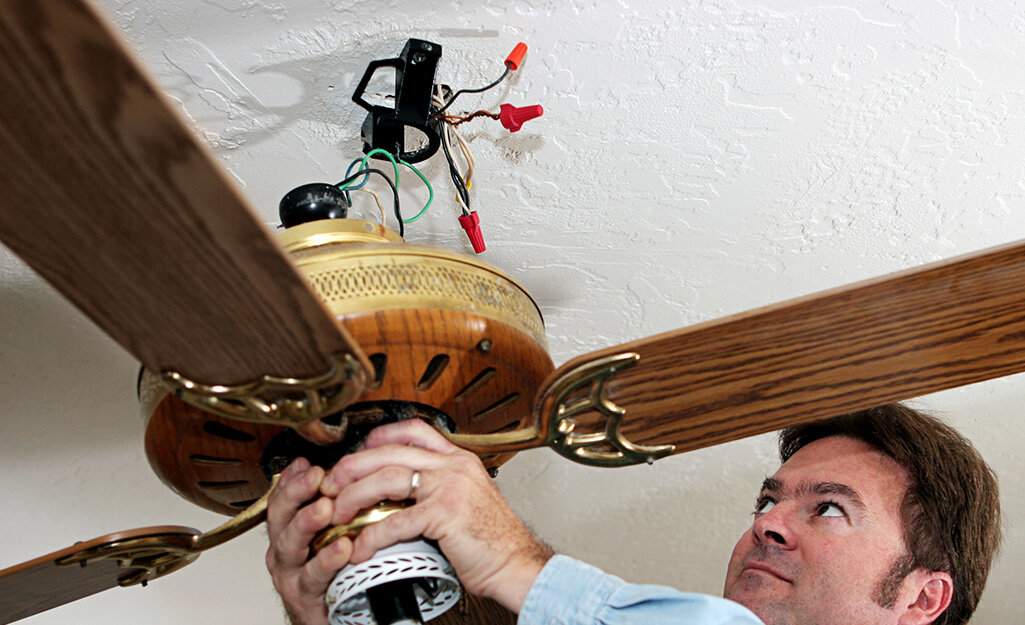
Remove the Metal Cover from a Downrod Fan

When removing a downrod fan, your next step will be to remove the metal cover or canopy that conceals the mounting bracket at the ceiling.
Some covers feature a decorative ring that conceals the screws and needs to be removed first.
Use screwdriver to remove the canopy support screws.
Depending on the fan design, you should be able to lower the canopy so it rests on top of the fan body.
Find the wires that lead from the ceiling fan motor and connect to the wires that hang from the ceiling. Remove the plastic caps or “wire nuts” that connect the sets of wires until the wires separate. Cover the ceiling wires with the caps or black electrical tape.
Support the fan and slide the ball at the end of the downrod out of the mounting bracket.
Be ready to lower the fan to the floor. Use a helper if needed.
Remove the Fan Body of a Flushmount Fan
When removing a flushmount fan, your next step will be to remove the body of the fan from the ceiling bracket. Many flushmount ceiling fans attach to the bracket with a hinge on one side and a screw on the other.
Remove the screw with a screwdriver to be able to access the wiring.
Allow the fan to hang from the hinge and disconnect the fan wires from the ceiling wires as described above.
Remove the fan body from the hinge on the mounting bracket.
If a safety chain connects the fan to a ceiling joist, unhook it to detach the fan.
Remove the Mounting Bracket

After removing the downrod or flushmount fan, the final step will be to remove the mounting bracket. If you’re replacing the old ceiling fan with a new one, it should have its own mounting bracket, which might not match the old one.
Most mounting brackets will be attached to the ceiling electrical box by several screws. Use a screwdriver to remove the screws and detach the bracket.
Keep the bracket with the rest of the old fan hardware.
Reattach the screws to the ceiling box in case you need them later.
Tip: If the old fan still works, be sure to save all the hardware so you can donate it to someone else or reuse it following the steps for How to Install a Ceiling Fan.
Ceiling fan removal is helpful to know when you need to dismantle an old fan or give a room a fresh look with a new one. Learning how to remove a ceiling fan requires following multiple steps and safely working with electric wiring to take down an old or faulty fan.
Need help identifying a ceiling fan? Find products fast with image search in The Home Depot Mobile App. Snap a picture of an item you like and we'll show you similar products.