How to Wire a Ceiling Fan
Wiring ceiling fans can seem complicated, but the task really just depends on the type of fan you are installing and how you want it to operate. Whether you are looking to wire a ceiling fan with lights to one power switch, or add a fan in a room without a switch source, this guide will teach you how to wire a ceiling fan using four common scenarios and the best wiring methods.
Familiarize Yourself with Wire Colors
Ceiling fan wire colors may be slightly different than your household circuit wires. It's important to understand what each wire does and how it connects with the others. Always place wire caps over unused wires.
Wiring a ceiling fan with four wires is the most common, however, an additional color wire may be incldued. Here is what each wire color represents:
Household:
The black wire is the hot wire that leads to the switch.
The white wire is neutral and completes the electrical circuit.
Copper or green wire is the ground wire and keeps your fan from experience power surges.
If you have a blue and black wire coming from your household circuit, you should have two switches on your wall.
If you had a red wire coming from your ceiling, it is hooked up to your wall switch.
Fan:
Black wire is for the fan.
Blue wire is for the light, if light is included with the fan.
White wire is neutral.
Green wire is for the ground.
Red wire is sometimes included and acts as a conductor to carry power to the light kit.
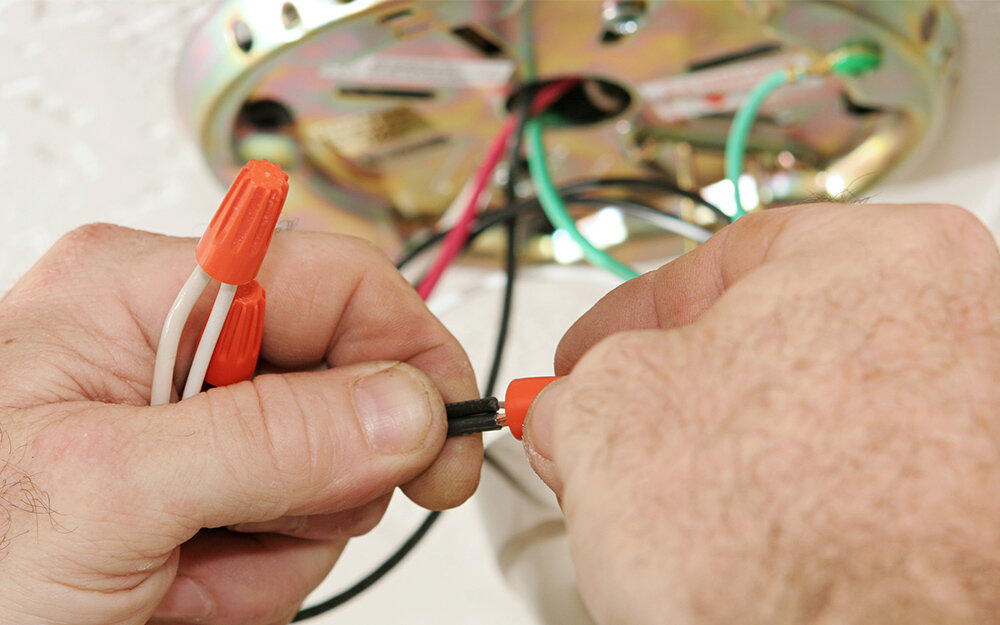
Before you begin, make sure all electrical circuit breakers related to the wiring are turned off. If needed, consult a professional electrician to ensure that your breaker box and electrical switches are to code. Also, make sure to strip the ends of your wires to expose the copper end.
Tip: Some manufacturers may use different color coding, so be sure that you follow the instructions included with your fan.
Wiring a Fan or Light Without Switches
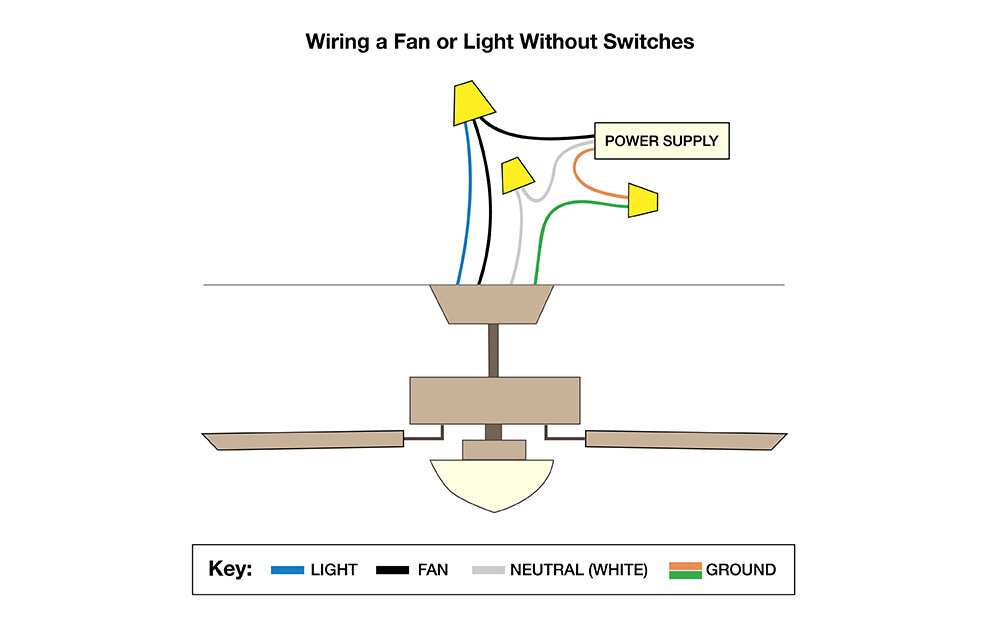
Typically used when there is no switch located in the room where the fan/light will be located. This option allows you to pull power for the fan and/or the light from one connection to a nearby power source.
This method means that you would be relying on the pull chains included with your fan to turn on the light and the fan. For rooms without switches, ceiling fan remotes can alleviate the need of using a pull chain.
Connect the white wires (neutral wires) from your fan and ceiling together.
Connect the green wire to your household ground wire (copper/bare wire).
Connect the black wires together.
Lastly, connect the blue wires together, or the blue wire to the black wire for lights. For ceiling fans without lights, follow the same step. This will allow you to add a light kit later on without having to rewire the fan.
Tuck the wires back into the box.
Turn the power back on and test the fan.
Single Switch Using Switch for Light and Pull Chain for Fan
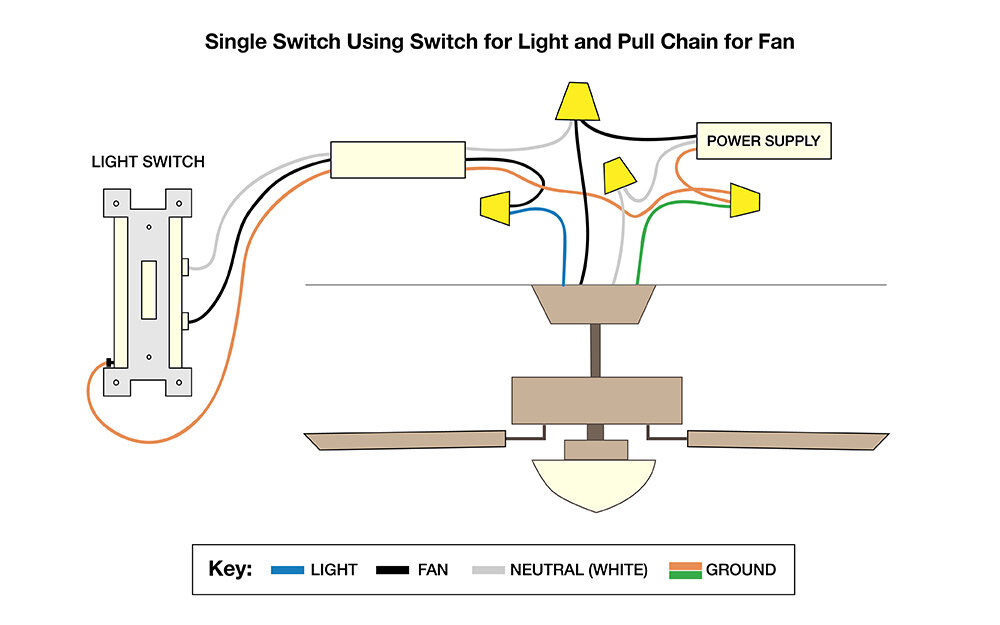
One of the most commonly used methods, this only requires one light switch.
In this scenario, we recommend wrapping the white wire with electrical tape to signal that it is a hot wire as opposed to a neutral wire. In order for the light to be controlled by its own switch, the wiring between the switch and the fan unit needs a fourth wire, a red wire, to carry power to the light kit.
Connect the green wire to your household ground wire (copper/bare wire).
Connect your white wires together and secure with wire nut.
Connect the red wire in the ceiling to the black wire in the light kit and the black wire in the ceiling to the black wire in the fan.
Tuck the wires back into the box.
Turn the power back on and test the fan.
Wiring Ceiling Fan and Light With One Switch
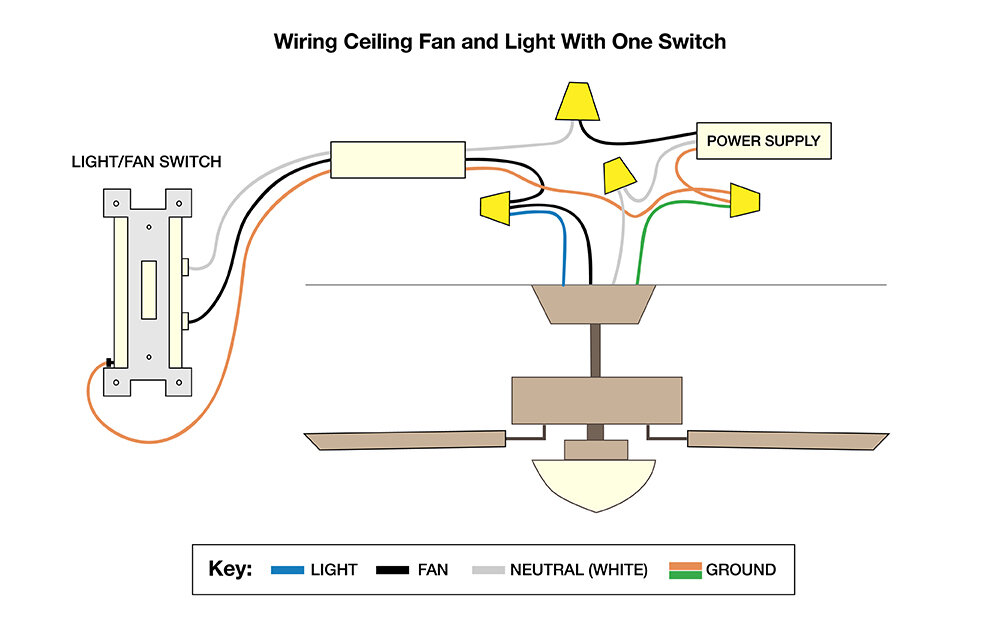
This method allows you to turn on the fan and the light from one single wall switch, cutting out the necessity to use the pull chain every time you want to adjust the fan.
Connect the green/copper wires together.
Connect white wires together.
Connect black wires together.
Connect the lighting wire, typically blue, to the black fan wire and the black ceiling wire.
Tuck the wires back into the box.
Turn the power back on and test the fan.
Wiring Ceiling Fan and Light with Separate Switches
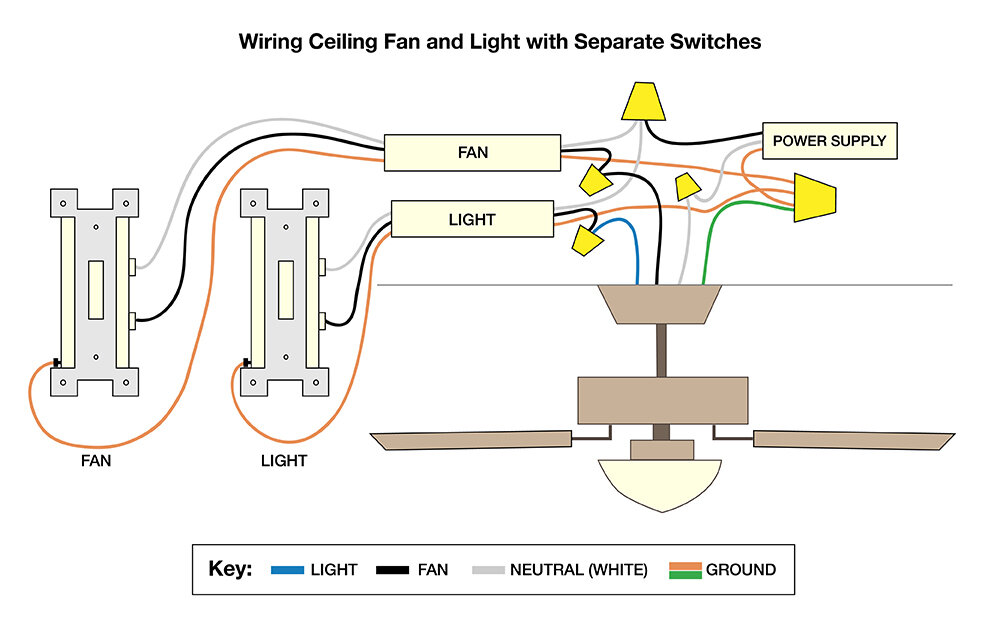
This method allows you to operate the fan and light power separately. Your power supply line (the black wire) should be feeding both switches and those switches power the fan (black) or the light (blue).
To do this method, the wire from your wall circuit to your light has to have 3 wires.
Connect black fan wire to the black ceiling wire.
Connect the blue wire to the red wire.
Connect white wires together.
Connect green/copper wires.
In the switch box:
Split the incoming hot wire into a "Y" and connect it to a terminal on each switch.
Connect the black wire to the screw located in swith #1.
Connect the red wire to the screw in switch #2.
Connect the white wires together.
Connect green/copper wires together.
Tuck all wires back in their boxes.
Turn power on and test.
Wiring a Ceiling Fan with a Remote
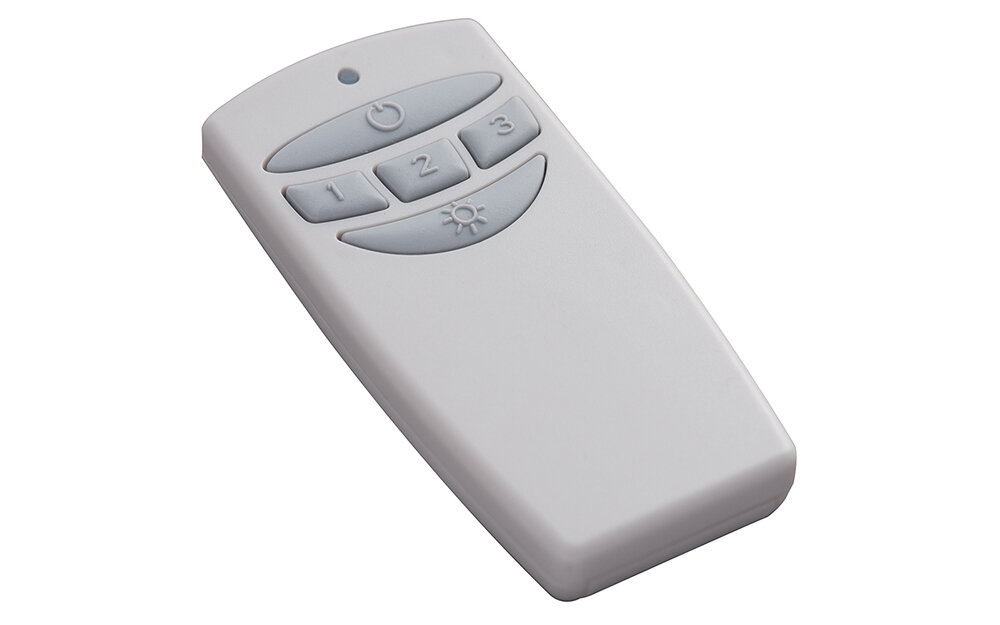
Most newer fans come with ceiling fan remotes for ease and convenience. The receiver is placed inside the body of the fan and the control will sit on the wall of your room. For a handheld remote:
Turn off the electricity.
Remote receivers will have DIP switches, or a series of button, and three or four wires.
Insert the battery.
Once you have the fan mounted and in place, slide the ceiling fan remote receiver into the space above the down rod.
Connect corresponding wires from fan to remote (white to white, black to black, blue to black and green/copper to green/copper).
Turn power back on and test.
Need tools and materials for installing a ceiling fan? Shop us online for the latest ceiling fans and light fixtures. The Home Depot delivers online orders when and where you need them.