Ceiling Fan Remote Troubleshooting
Ceiling fan remote controls can make it much easier to operate your ceiling fan. Most serve as light switches as well as turning on the fan and adjusting its speed. If your ceiling fan isn’t working, there may be a problem with the remote control. This ceiling fan remote troubleshooting guide reviews the standard problems with remote controls and how to fix them.
Tip: Your ceiling fan may be having a problem separate from the remote control. Check our guides for ceiling fan troubleshooting and Hampton Bay ceiling fan troubleshooting as needed to make sure.
Is the Ceiling Fan Remote in Range?
A remote control designed for use with a ceiling fan contains a transmitter. When operating properly, the remote transmitter sends a signal to a receiver in the ceiling fan that gives the fan simple instructions.
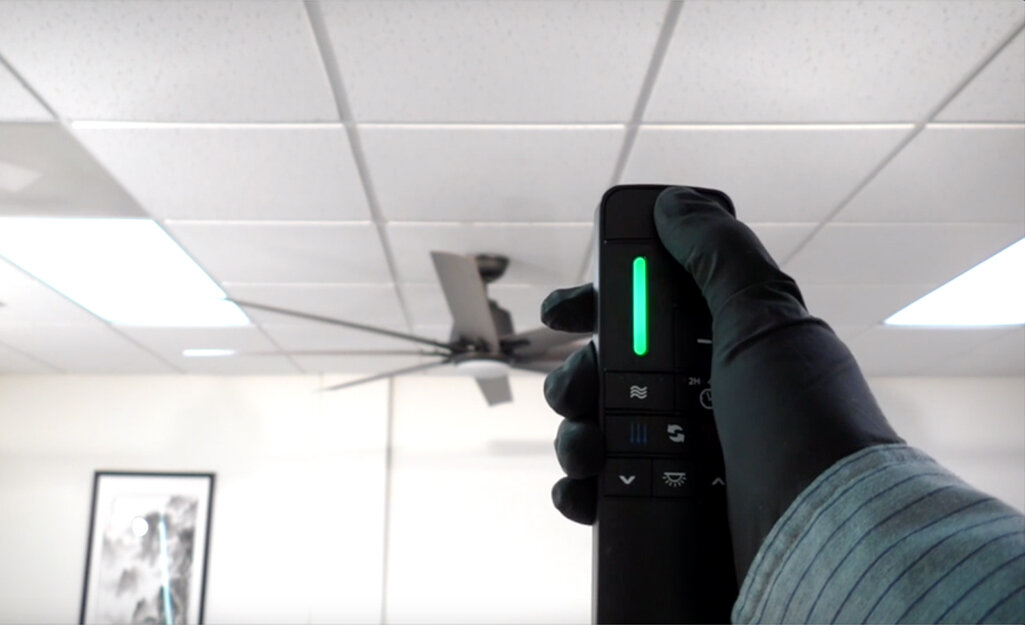
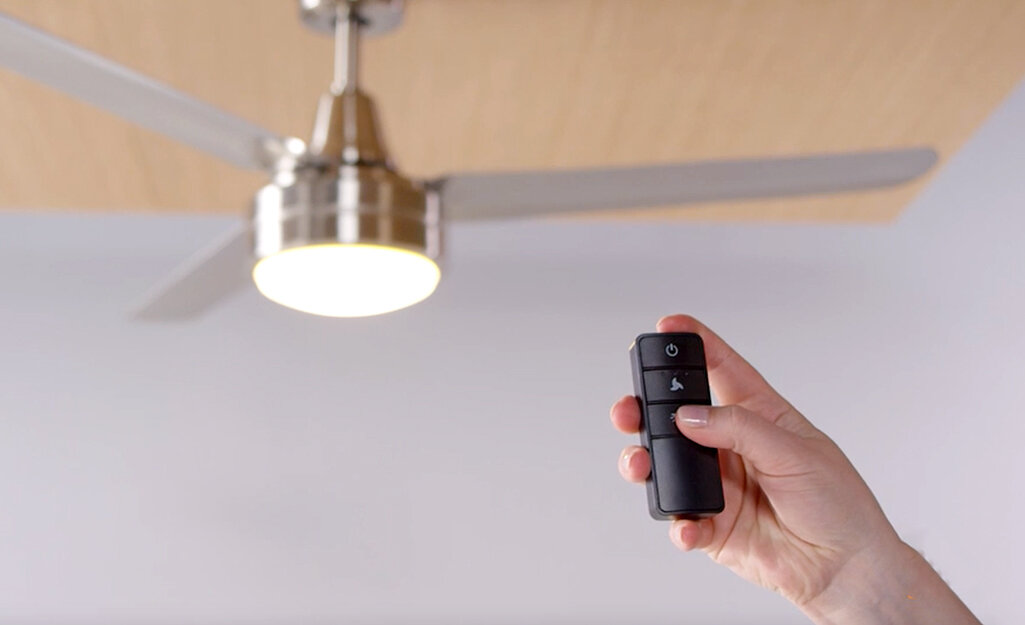
Is you ceiling fan remote not working? Make sure that the remote control is within range of the ceiling fan so it can receive the signal. Many fans have ranges of more than 40-feet, but to test one, be sure to bring the control within 10- or 20-feet of the fan.
In addition, make sure there’s no obstruction between the remote control and the fan, such as a piece of furniture, to make sure the fan can receive the signal.
If the ceiling fan remote control only works at very close range, the batteries in the remote may have a low charge and need to be replaced.
Tip: If you’re testing a remote control in a large room that has multiple fans, make sure to use the correct remote.
Does the Ceiling Fan Remote Have Batteries?
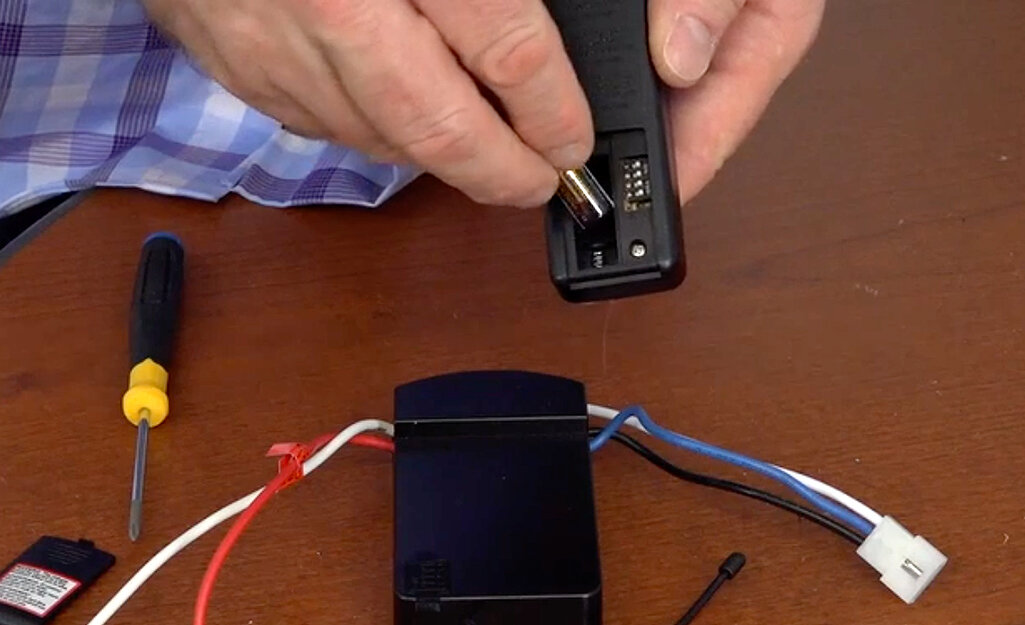
Perhaps the most common cause for a ceiling fan remotes not working is either a lack of batteries or dead batteries.
If your remote control has an indicator light, check to see if it comes on. If it doesn’t, that’s a good sign that it has a battery problem.
Open the remote control battery cover.
Make sure it has batteries and that they’re in the correct position.
Use a battery tester to make sure the batteries have a charge.
If necessary, place fresh batteries in the remote control, close the cover and test the control.
Tip: If the ceiling fan has pull cord "on" switch, make sure it’s in the on position. If the ceiling fan is turned off at the fixture, the remote won’t work. If the pull cord does not turn the fan on and off during the test, make sure that the circuit breaker for the fan is in the correct position.
Is the Ceiling Fan on the Correct Frequency?
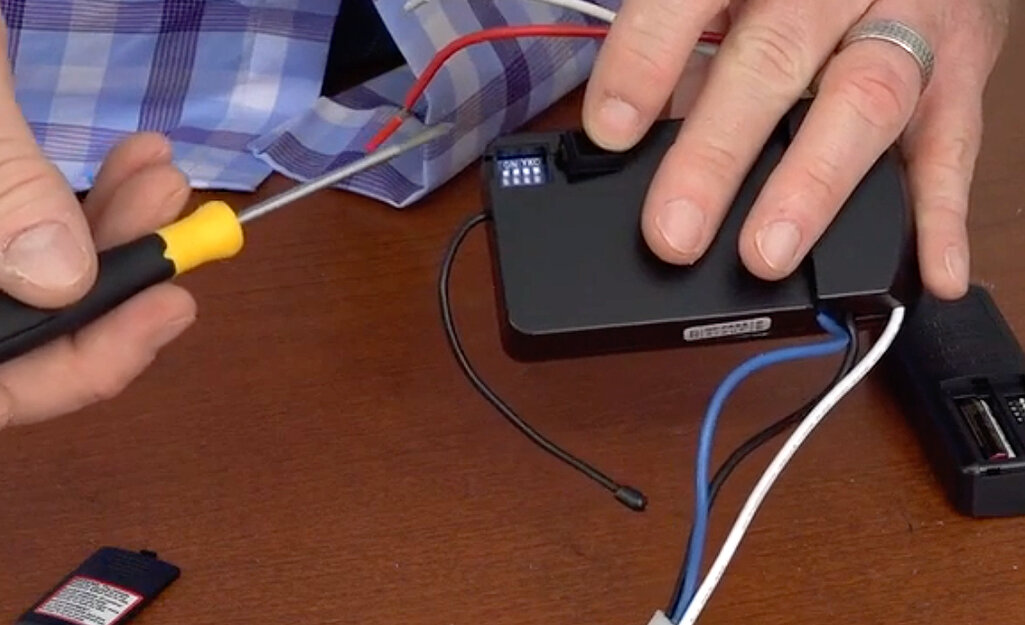
If the remote control is within range and has charged batteries, the ceiling fan and the remote control may not be on the right frequency. Ceiling fans have a dip (for “dual in-line package”) switch for setting the frequency. Follow these steps to set or reset the frequency of the ceiling fan.
Turn off the circuit breaker that provides power to the ceiling fan.
Stand on a step ladder and use a screwdriver to detach the ceiling fan canopy from the mounting bracket.
Locate the receiver and identify the dip switch settings, which should resemble four sliding buttons.
Use a small screwdriver or ballpoint pen to slide the buttons and create a new frequency combination. Record the dip switch setting.
Return the receiver to the ceiling fan and attach the canopy to the mounting bracket.
Use the circuit breaker to turn the power back on.
Tip: If you have multiple fans in a room that need to run separately, you may need to set separate frequencies using this method.
Is the Remote Control on the Correct Frequency?
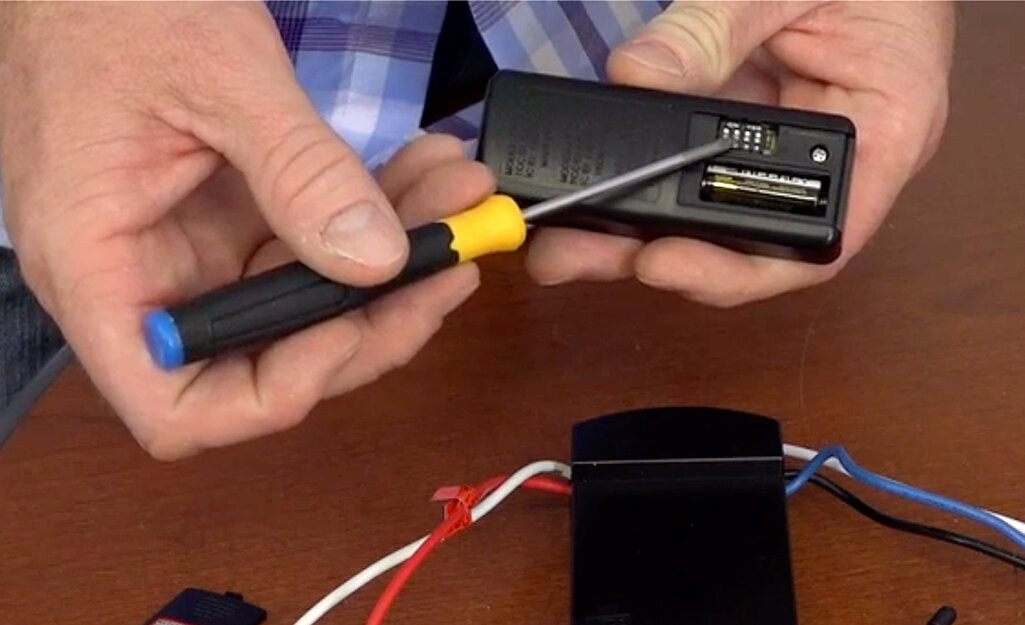
You also have to set the frequency with the dip switch on the remote control.
Remove the batteries from the remote control.
Remove the back of the remote control. You should be able to find and remove a small panel that covers the dip switches.
As in the previous step, use a pen or screwdriver to slide the buttons to match the frequency of the ceiling fan receiver.
Put the remote back together and replace the batteries.
Try the remote control to make sure it properly operates the ceiling fan.
Tip: If the ceiling fan still doesn't work, there may be a problem with the wire connections.
Replacing a Ceiling Fan Remote Control
If the ceiling fan remote is still not working after these steps, you should replace it. If you cannot find a remote control from the same brand as the ceiling fan, get a universal ceiling fan remote.
If you need to install a wireless receiver in the fan, shut off the power, remove the canopy as described in step 4 and install the receiver according to manufacturer’s instructions.
Adjust the dip switch to match the frequency and reassemble the fan.
Install the batteries into the new universal remote control.
Turn on the fan and pair the universal remote to the fan by pressing the startup buttons according to the manufacturer’s instructions.
Ceiling fan remote troubleshooting will often reveal a problem with the batteries, but following all the steps may help you fix the issue. Troubleshooting your ceiling fan remote can ensure that the fan will continue to work with just the press of a button.
Need help identifying a ceiling fan? Find products fast with image search in The Home Depot app. Snap a picture of an item you like and we'll show you similar products.